Ring your first sale
For Cashiers · 5 min read · Last reviewed 2026-08-04
Checkout is where money changes hands. This is the flow your cashiers repeat all day: build the sale, take payment, hand over the receipt. It works the same whether you’re online or offline — sales queue locally and sync when the connection returns.
Here’s the shortest path from an empty cart to a paid order.
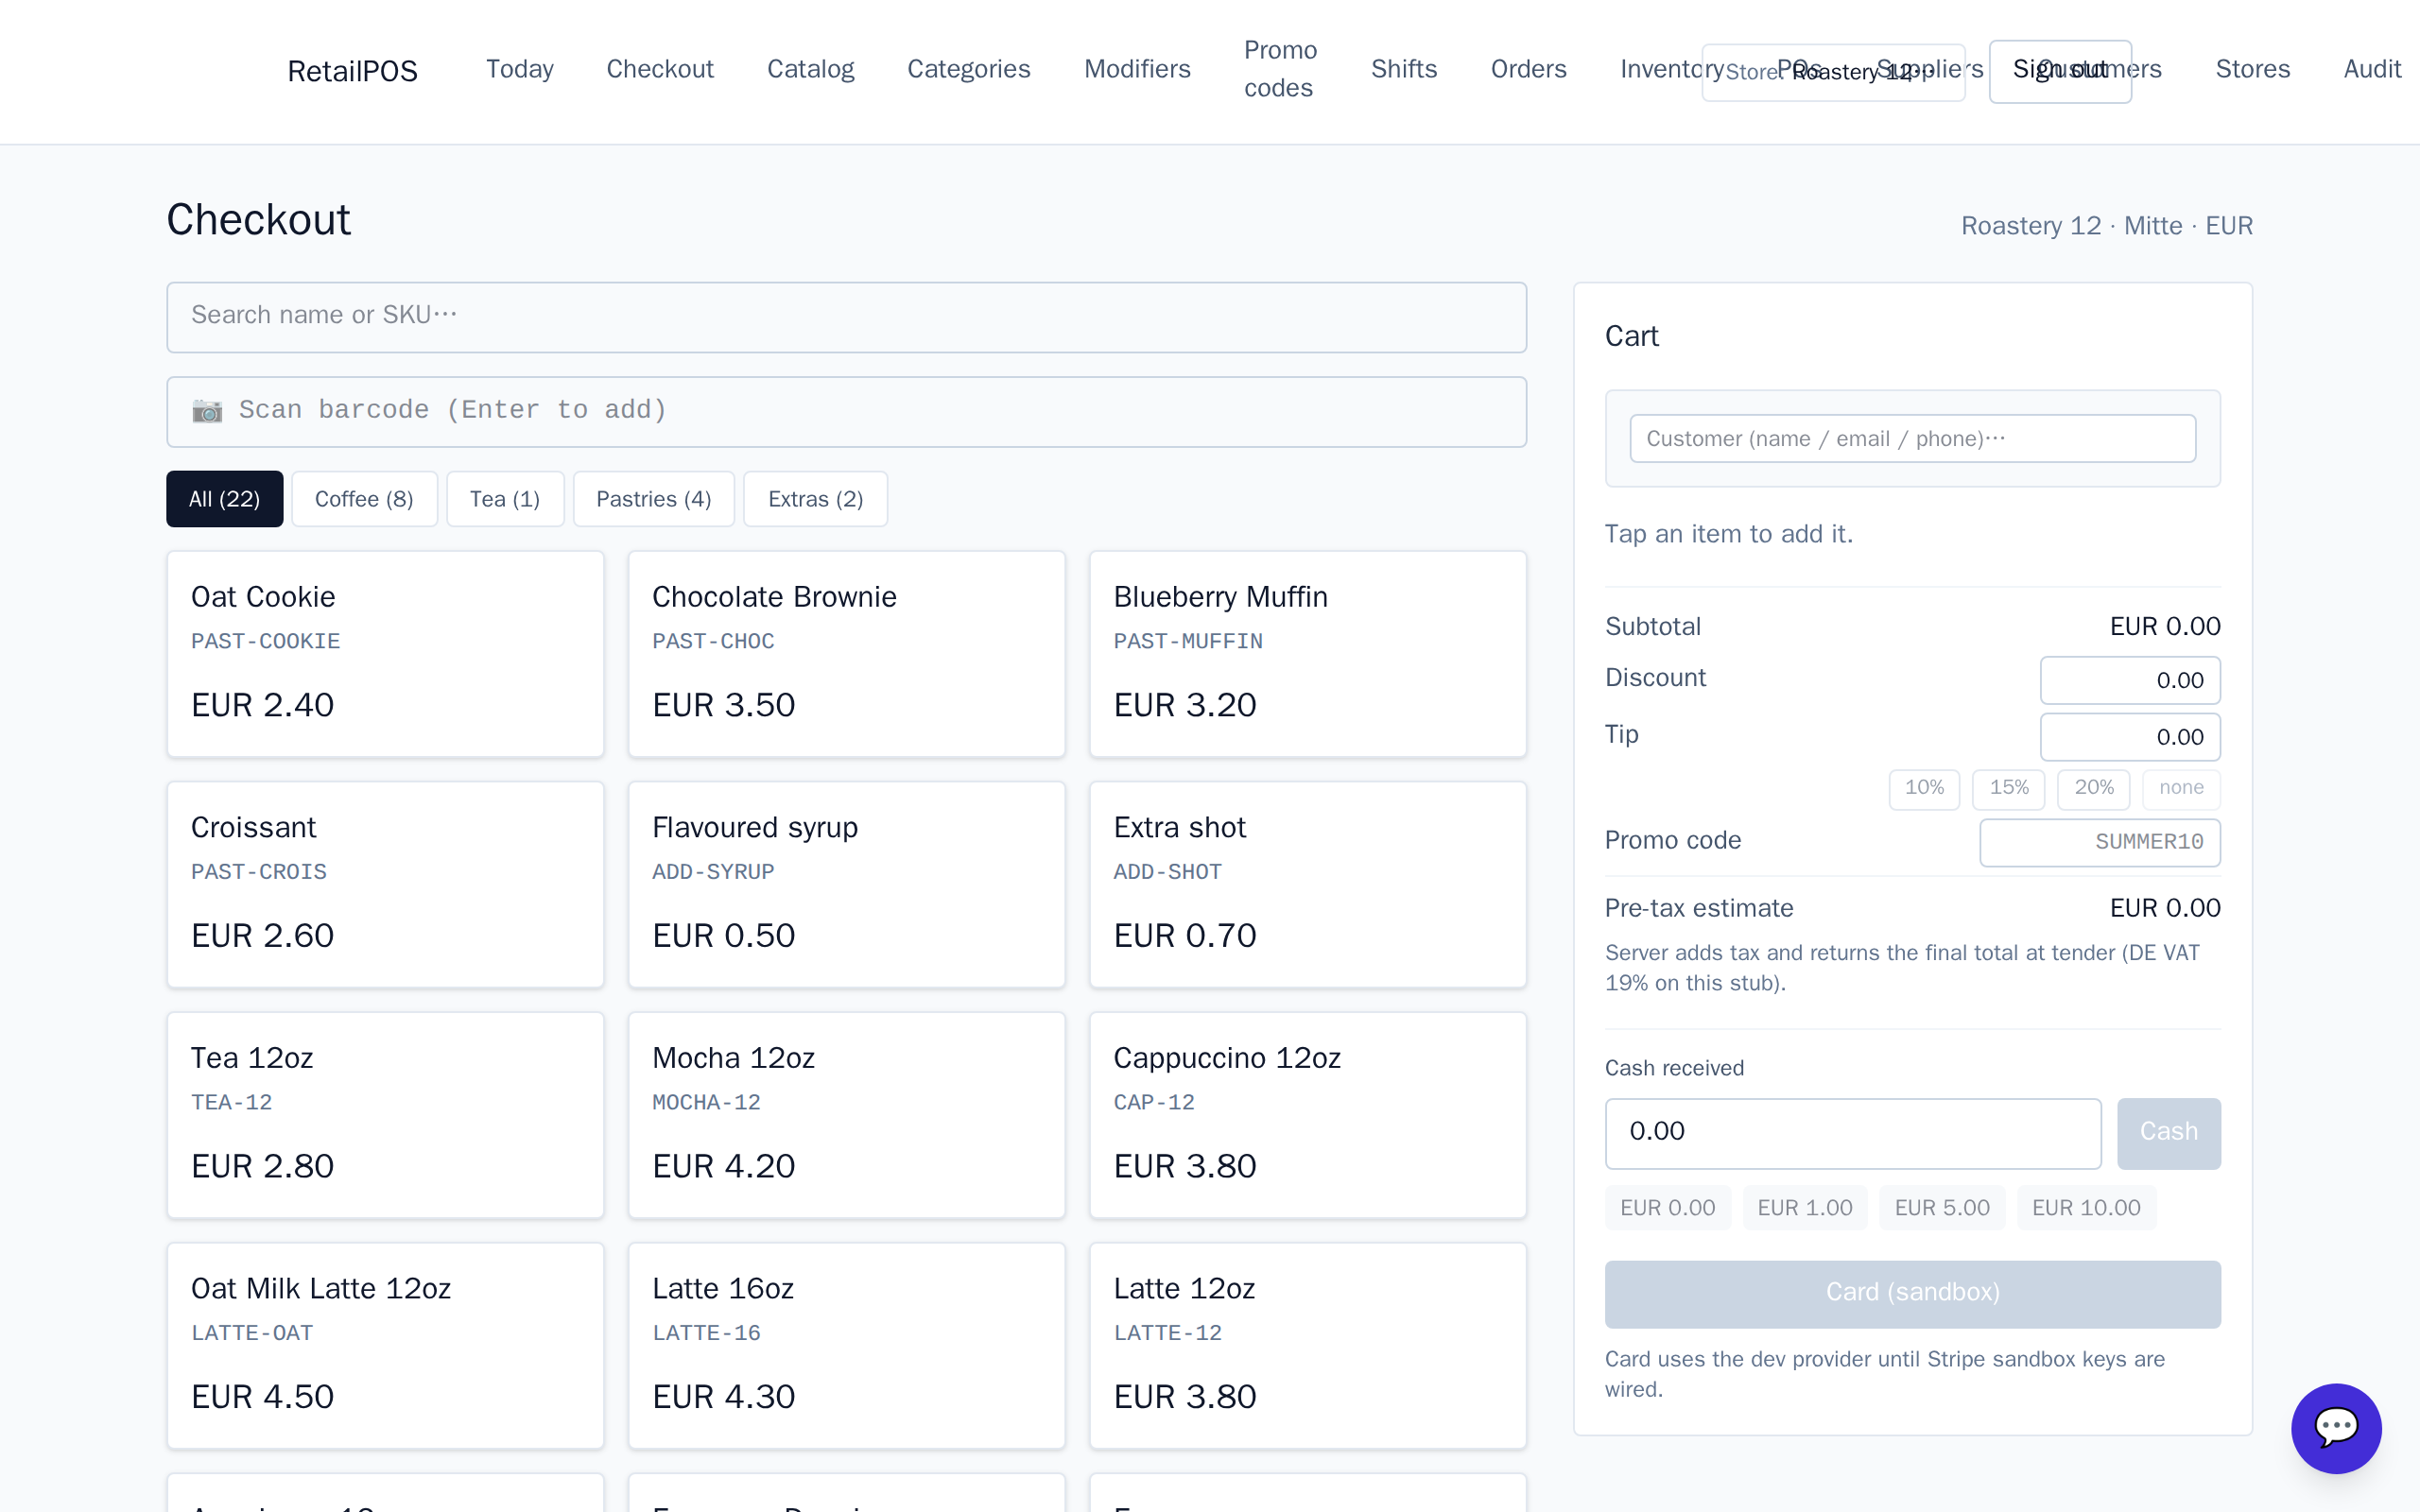
Build the sale
- Open Checkout.
- Tap items to add them, or scan a barcode. Pick any modifiers the item prompts for.
- Adjust quantities in the cart. The running total updates live, tax included.
Discounts and customers
Apply a manual discount or a promo code before payment. Attach a customer to the sale to build purchase history and — if you run loyalty — earn points on this order.
Take payment
Choose a tender: cash (enter the amount tendered and the drawer shows change) or card. You can split across tenders. Once paid, the order is final and stock decrements automatically.
The receipt
After payment you can print the receipt or email it to the customer. Every sale is stored, so you can reprint or refund it later from Orders.
Frequently asked
- Can I take payment offline?
- Yes. The register works offline — sales are stored locally and sync to the cloud automatically when the connection returns.
- How do I refund a sale?
- Open the order under Orders and issue a refund. Refunds restock the items and are limited to what was sold; a shift-lead role or above is required.
Put it into practice.
Open your shop and try it live. Free until your first 100 sales — no card, keep your hardware.